Using handlebars-based mail merge with Microsoft Flow
Occassionally, we find ourselves wanting to send outgoing emails based on a template that is populated with data coming from different sources – we typically call this mail merge – and we use it to send emails out for things such as continuous status updates to a few people or sent to a larger audience to perform activities such as marketing automation.
The out-of-the-box functionality found in Microsoft Flow via the body field of the ‘Send an Email’ action is great for this, but it sometimes can be burdensome to update the email body within MS Flow when it comes time to change the copy of the email template – especially when there’s a large number of fields within the body’s contents. Often, we also want to update the copy contained in the template without needing to update, or even touch, the Flow itself.
This post will describe how to use an email template that uses handlebars as the markup language for the template, and merge the template with data gathered by a MS Flow through a custom Azure Function. We’ll grab the email template itself from a web-based source - in our case, a gist - but we could host the template anywhere that MSFlow can connect to – such as a file in a SharePoint Document Library, a file in OneDrive or any other connection that MS Flow provides to retrieve a file.
First, since there currently isn’t a provided MSFlow action to merge data with a handlebars template, let’s create a simple one and host it via an Azure Function. I’ll keep the development description in this post simple, by pointing to an existing Handlebars Azure function implmentation called Handlebarrit. The code contained in this repository simply exposes a way to merge JSON data with a Handlebars template as part of a POST request to a Azure Function. It does this using a great library called Handlebars.net
We’ll also use the existing Azure function that is provided by the Handlebarrit function. If you’d like to host your own, feel free by pubishing the Azure function contained in the project to your own Azure account and replacing the urls described below with your endpoint.
Now that we’ve got our microservice that applies data to a Handlebars template, we’ll connect to it via a connection in MS Flow. To do so, add a new custom connection in Microsoft Flow. Populate the initial form with the following data:
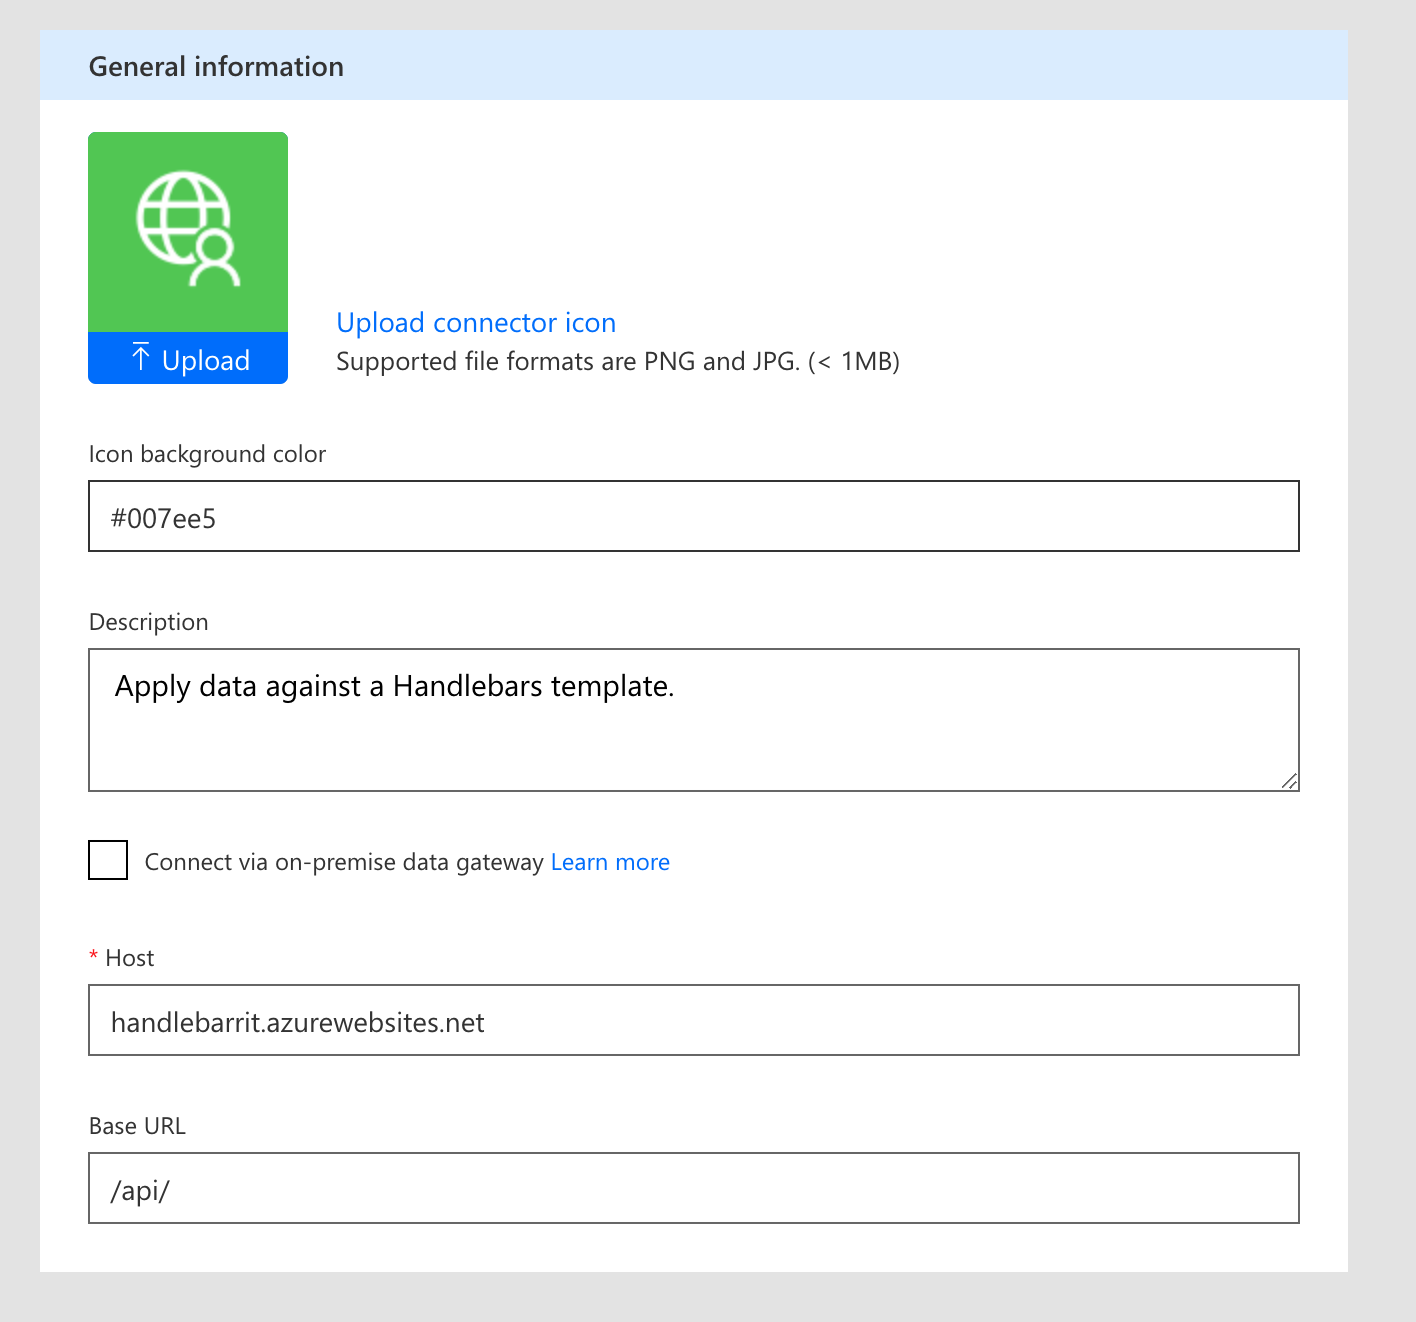
The endpoint doesn’t have any authentication, so we can leave this blank.
Next, we’ll describe the request parameters.
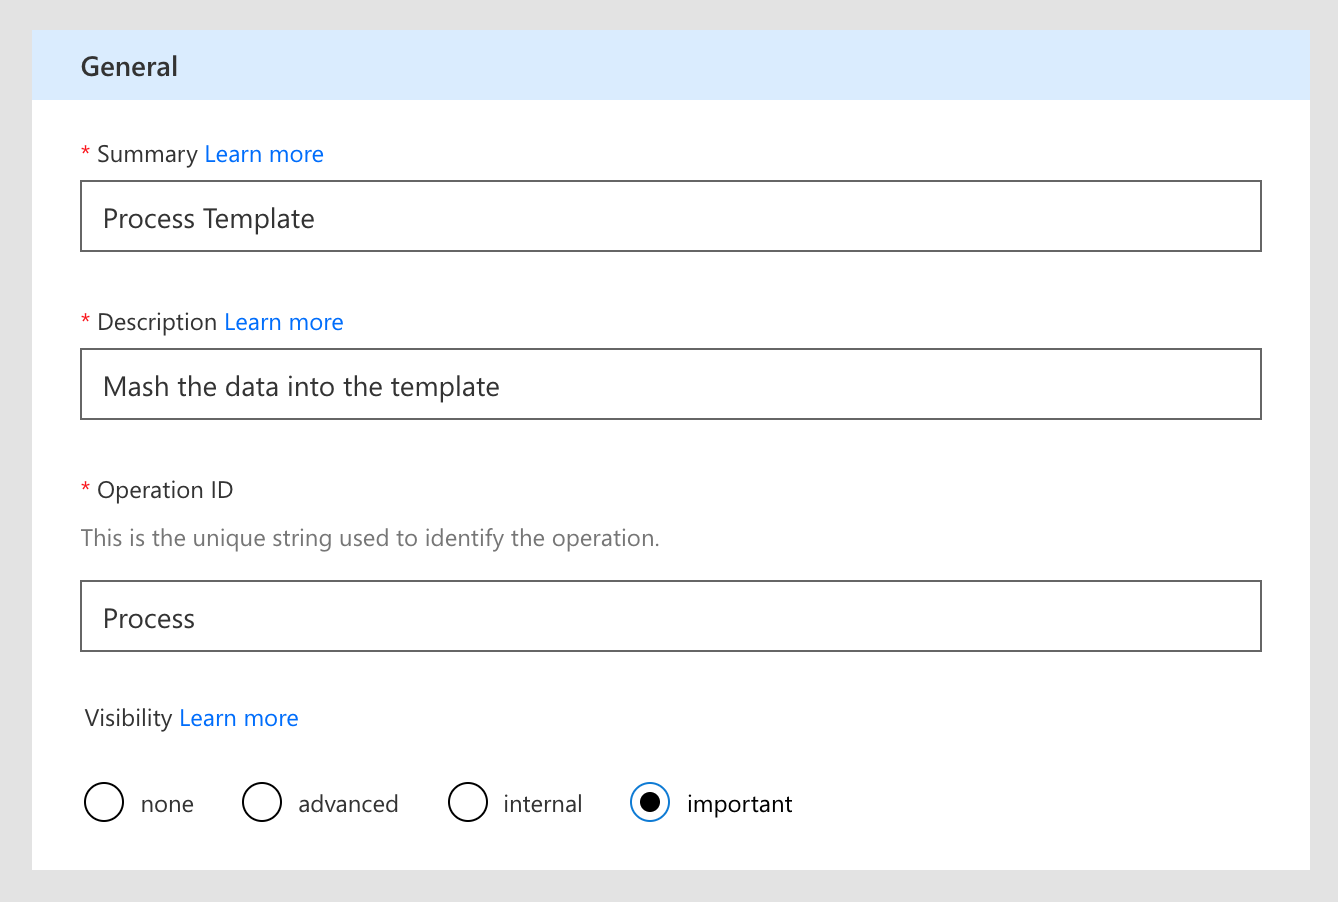
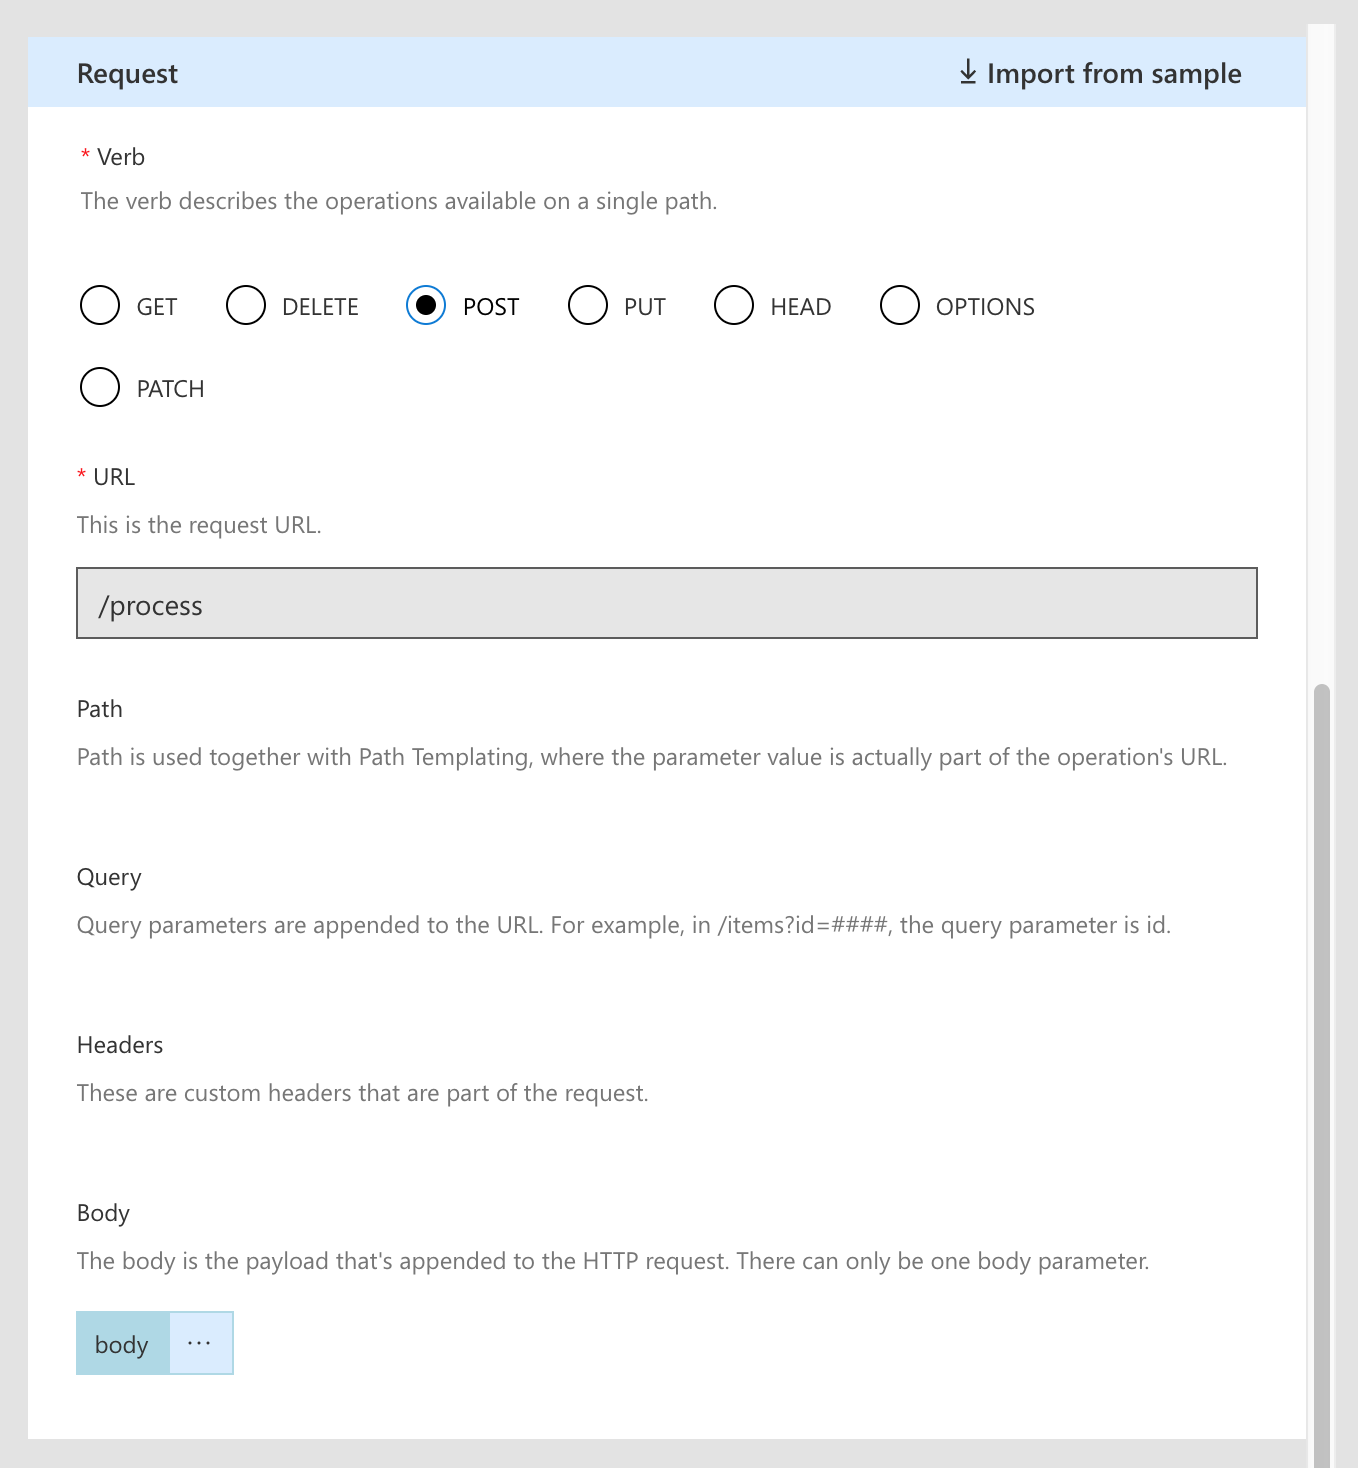
You should now be able to test this connection with the following data, and it will succeed.
{
  "template": "<div>
  Hello, !!!
</div>",
  "data": { "location": "world"}
}
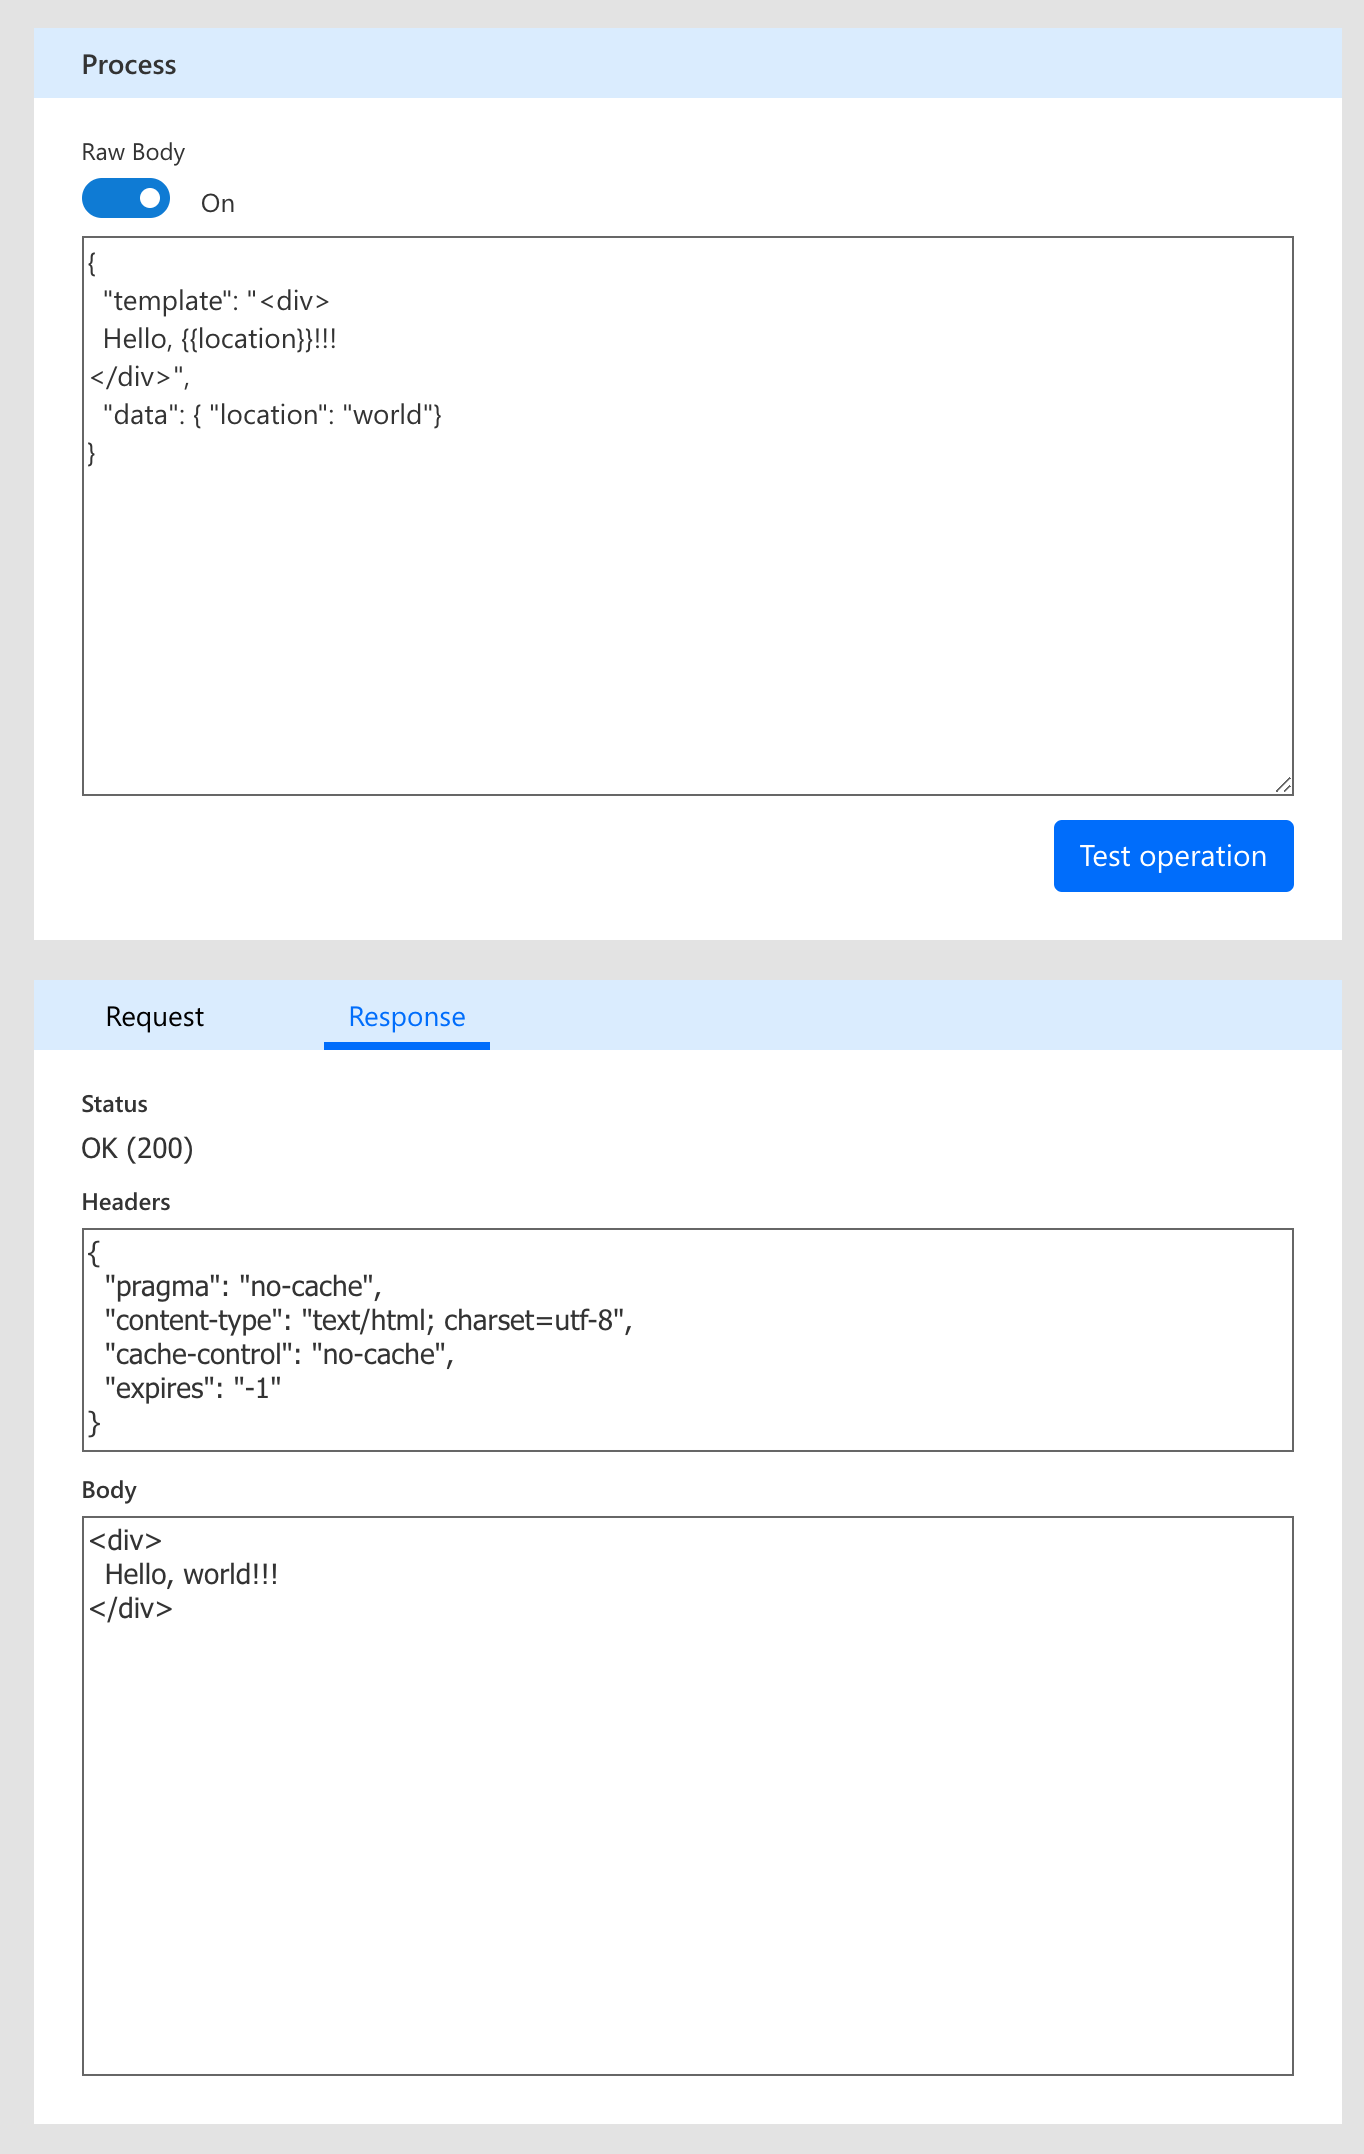
Congratulations! We just connected to a service that merges data with a handlebars template.
Alright, we now have the pieces that we need to create our Flow.
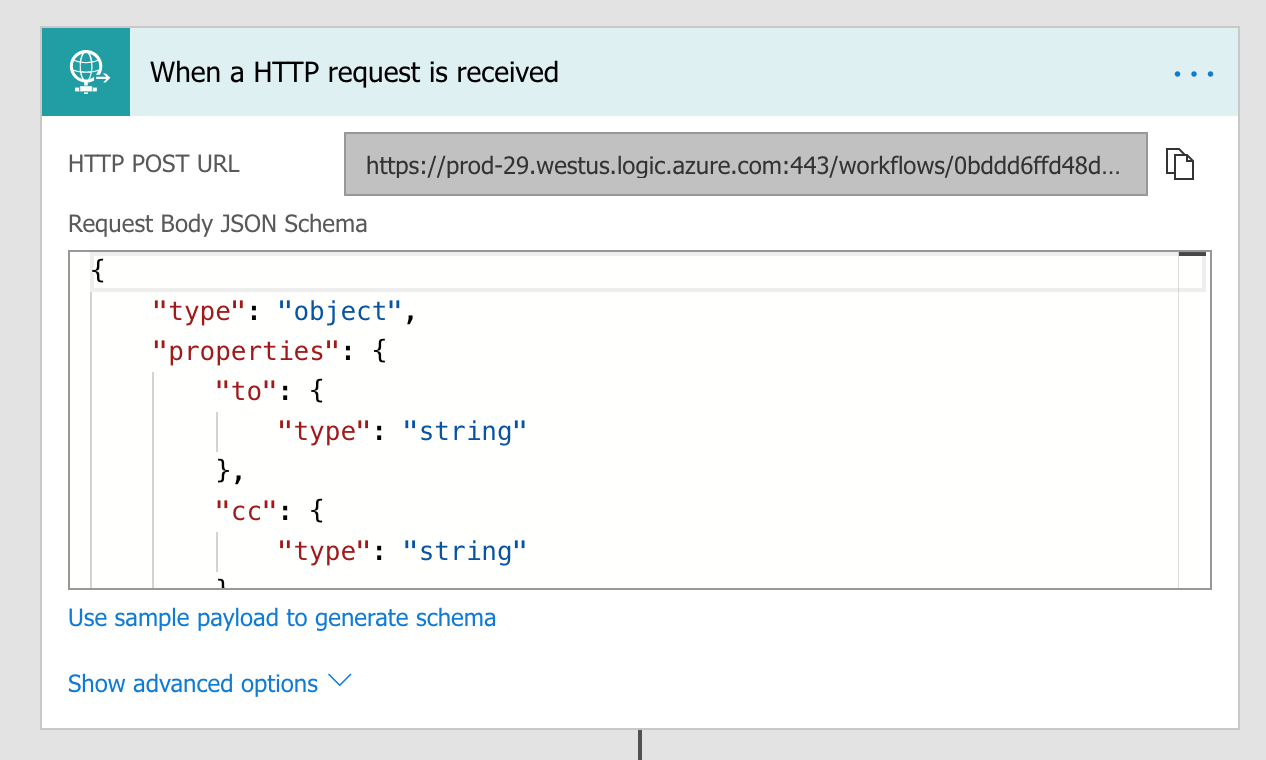
We’ll start by creating a blank flow, and adding an initial ‘Http Request’ trigger. This will let our flow be triggered by a parent flow so that we can reuse it.
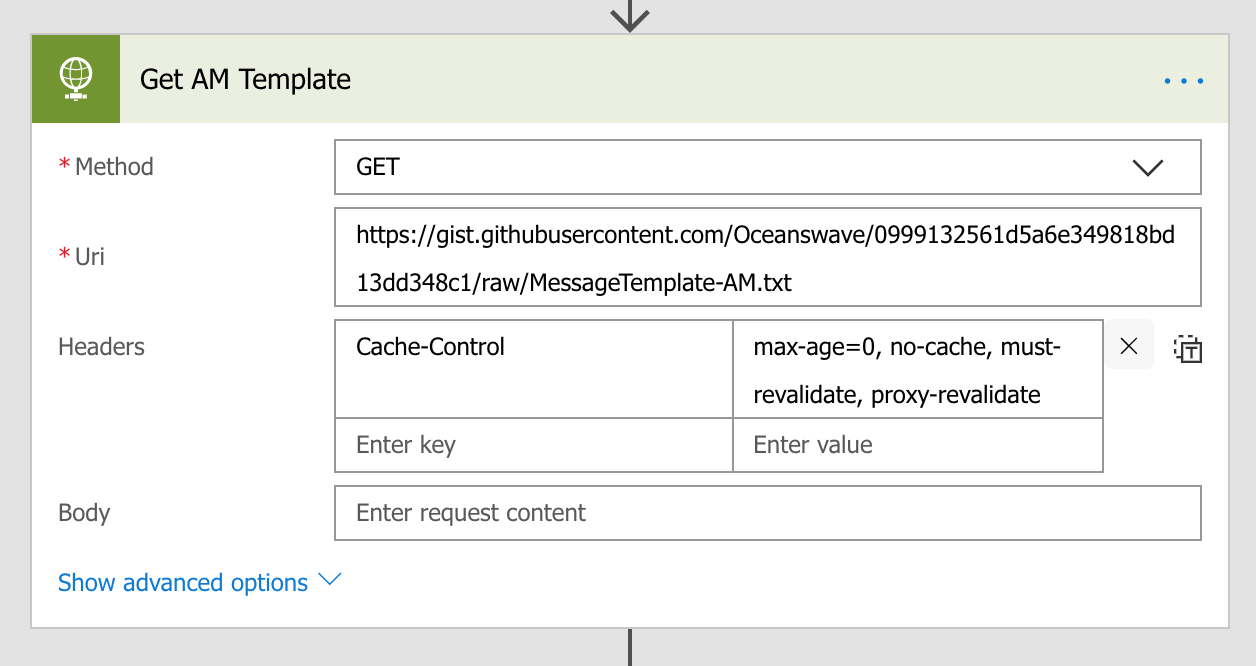
Next, let’s get the template that we’ll use. I’m hosting my template on a gist, so I’ll use a GET request to my template’s URL but, as mentioned before, this can be another location.
Now that we have our template, I’m going to get some data to populate our template with. I’ll get the weather for my location as well as uncompleted tasks in a MS Planner instance
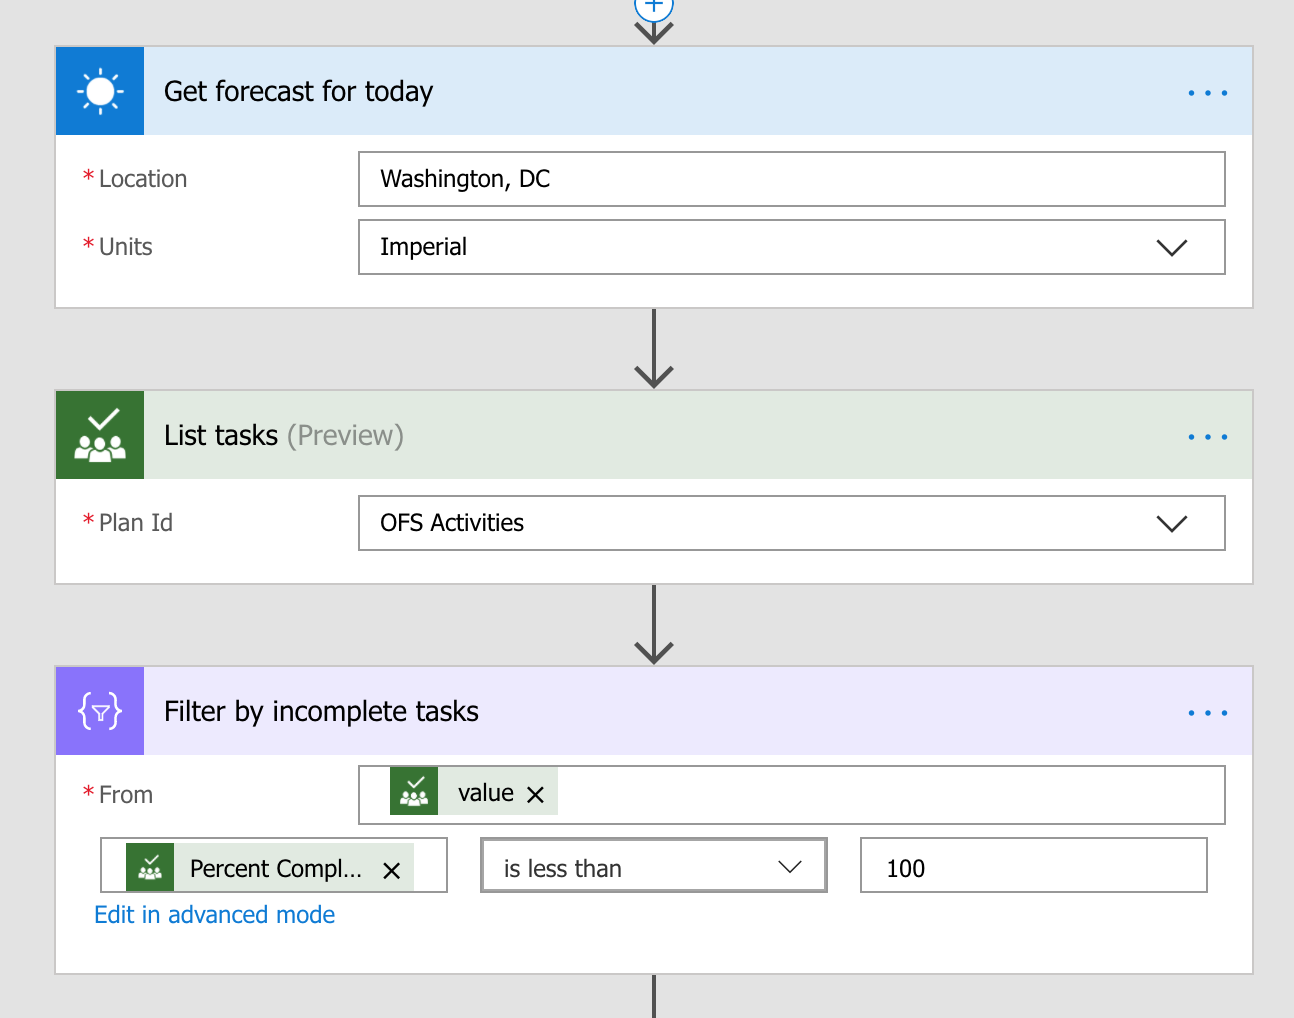
Great. Now that we have the template and the data, we’re ready to submit this to our Handlebarrit connection, but first, we’ll need to transform what we have into the body of the POST request. We’ll use the Select Data and Select Body actions to do this:
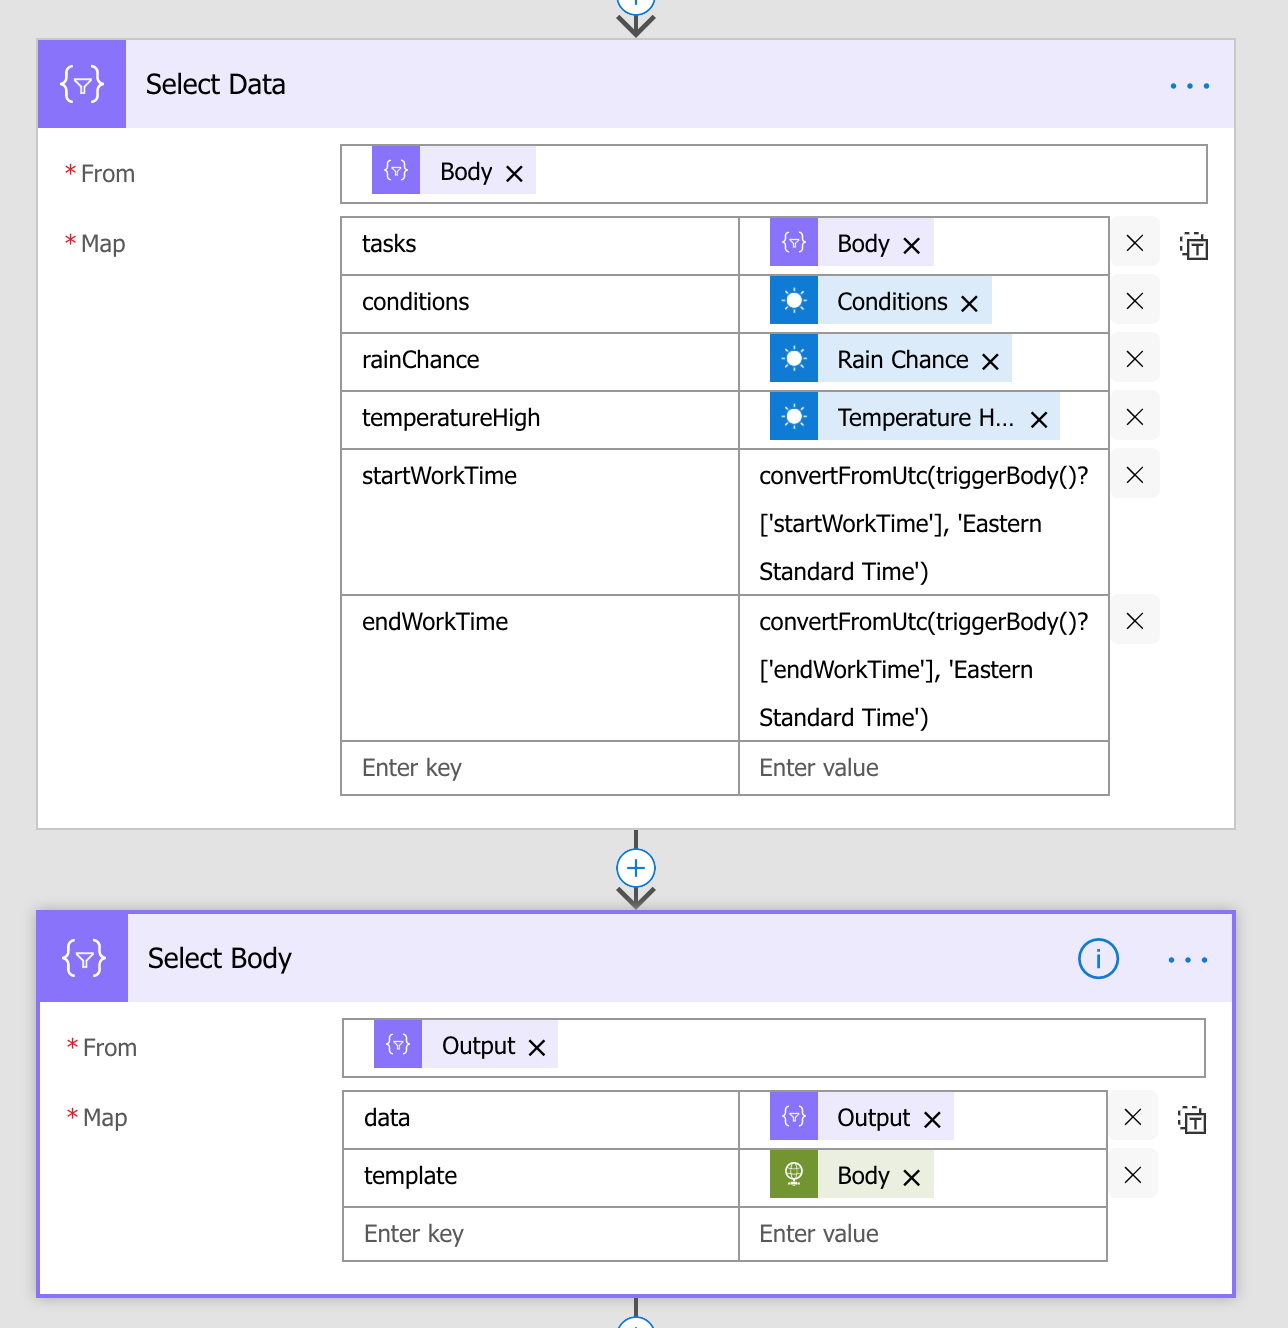
Alright! Now we can actually perform the request by using our custom connection to Handlebarrit. We’ll use the ‘output’ parameter that we got from the Select Body action as the body. We’ll also take the response – our template merged with data – and send it as the body of an email.
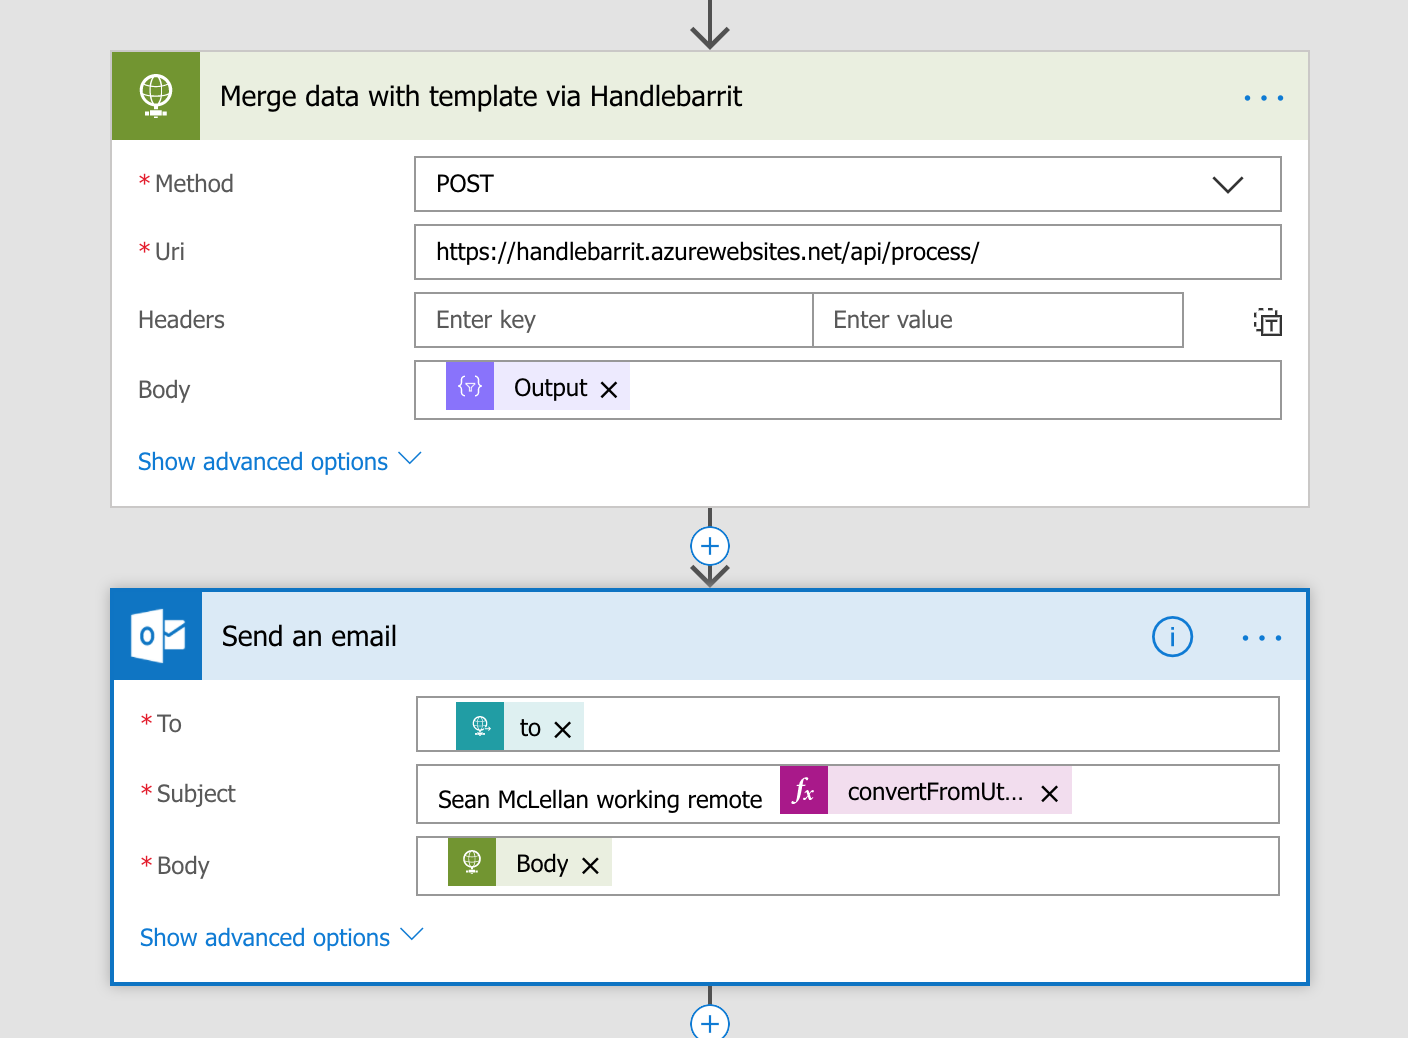
In this post, we’ve seen how we can create a custom Azure Function to perform mail-merge using Handlebars that MS Flow doesn’t provide. We take data from existing MS Flow connections and merge them with a template and use this as the body of an outgoing email message.



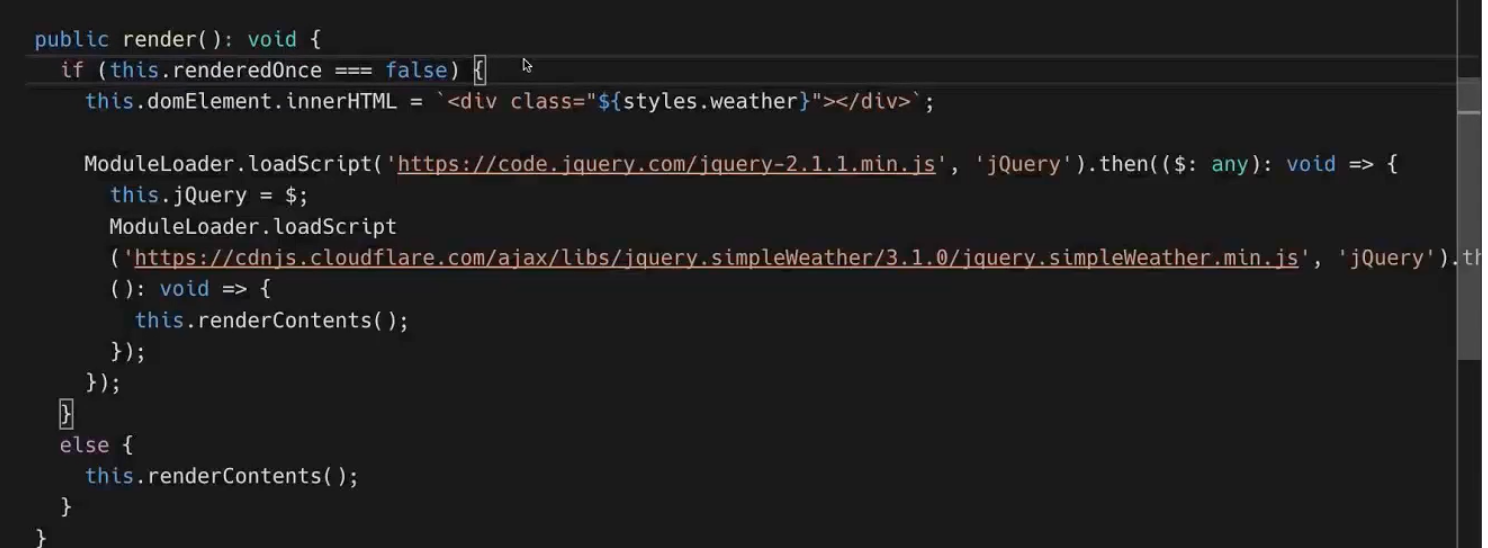

 This is using webpack’s require function to load jQuery and adding it to the global object and doing so in a TypeScript friendly manner.
